
 Analysis byWeUseApps
When I open CapCut for the first time, I think of it less as a tiny video trimmer and more as an editing desk built for making short, polished clips on a phone. That can be reassuring if you want to turn a handful of camera videos into something shareable, but the number of editing choices can feel like a lot before you know where to begin. My advice is to start with one simple goal: join a few moments, make the cuts feel intentional, and watch the result before adding effects.
CapCut is a free video editing app from Bytedance Pte. Ltd. in the Video Players & Editors category. It has a 3.5 average from around 13 million ratings, and it has passed a billion installs. Those figures suggest an app used by a huge range of people, but they don’t tell you whether its editing style suits you. I find it most useful for personal clips, social posts, quick explainers, and other projects where a phone-first workflow matters more than a traditional desktop timeline.
What to expect when you start editing
For a first project, think in terms of a short sequence rather than a complete production. Choose a few clips that already tell a small story: a meal being prepared, a walk through a market, or a pet doing something funny. A clear subject gives you a better chance of finishing than a folder full of unrelated footage. CapCut’s appeal is that you can shape this material on your phone without first learning a heavyweight editing program.
The main adjustment is learning to treat the timeline as the heart of the project. Instead of trying every visible option, first arrange the shots in the order you want, trim away the slow starts and endings, and play the sequence back. This simple pass often improves a clip more than a pile of decorative choices. The best first result is usually a clean, understandable edit, not the one with the most effects.
CapCut is aimed at editing as well as playing and sharing video, so it makes sense when you need to alter footage rather than simply watch it. If your only goal is to browse a video library or make a tiny cut to one recording, a simpler player or basic trimming tool may take less effort. I’d choose CapCut when I expect to combine material, adjust its pacing, and make the finished clip feel like one piece.
Set up a project around the footage you have
On first use, give yourself a moment to identify the clips you actually want. It is easy to get distracted by the prospect of polishing everything, especially when you have many similar takes. I recommend picking the strongest few first and leaving the rest alone. A small, deliberate selection makes the timeline easier to read and helps you judge whether a shot earns its place.
Before editing, decide where the video will be watched. A clip intended for a phone feed may benefit from a tighter composition and faster pacing than a family video meant to be watched on a larger screen. That choice affects what you keep: a detail that reads clearly on a phone can be more useful than a wide shot with lots of empty space. I would make this decision early, then check the preview as you work instead of waiting until the end.
Keep the first project modest. One useful exercise is to make a short sequence with a beginning, a central moment, and a final shot. That gives you a practical way to test your editing decisions without turning setup into a project of its own. If the source clips are shaky, poorly framed, or difficult to see, editing can improve their order and timing but cannot magically make the original footage perfect. I try to choose the clearest take rather than spending time trying to rescue every recording.
Make your first edit succeed before adding decoration
My recommended first pass is straightforward: place the clips in order, trim pauses that do not add anything, and watch the whole sequence once. Pay attention to whether each shot has a reason to follow the previous one. If the video feels confusing, rearranging or removing a clip is often more effective than adding a transition. This is one of the most useful habits for a beginner because it gives you a finished structure before you start fine-tuning.
Next, listen to the result. Sound can make a cut feel smooth or surprisingly abrupt, even when the pictures look connected. If your clip includes spoken words or important ambient sound, check that those moments remain understandable after trimming. If you are making a silent visual montage, judge whether the images alone communicate the idea. Either way, watching once with your attention on sound and once with your attention on picture can reveal different problems.
Then add only the finishing touches that solve a real need. A transition can connect two scenes, but it can also draw attention away from the subject. A visual effect may suit a playful clip and feel out of place in a calm travel memory. I find it helpful to compare the edit before and after each addition; if the change does not improve clarity, mood, or pacing, I remove it. This keeps a first attempt from becoming harder to follow just because the editor offers many ways to decorate it.
A realistic everyday use is making a quick recap after an outing. I might select a shot of arriving, a detail that captures the place, and one final moment with friends. Trimming each clip to its most expressive part gives the video a natural rhythm, while keeping the selection small makes it easier to finish before the memory has gone cold. That is where a mobile editor earns its place: I can make a shareable record from footage I already have, instead of letting it sit unused in the camera roll.
Where beginners commonly get stuck
The most common confusion is mistaking more options for a better edit. When the preview looks unfinished, it is tempting to add several effects, filters, and transitions at once. The trouble is that it becomes hard to tell which change helped and which made the clip busier. I would add one kind of adjustment at a time and replay the sequence after each meaningful change. If you lose track of what you altered, return to the simplest version that still communicates your idea.
Another friction point is judging a clip from a single still moment. A frame can look attractive while the movement before or after it feels awkward. Preview the entire sequence, not just the best-looking section, and pay special attention to the first and last seconds. Those edges often reveal an abrupt cut or an unnecessary pause. A short edit can feel much more deliberate when it begins promptly and ends cleanly.
It also helps to separate editing from exporting in your mind. A project that looks right in the editing view still needs a final check as a complete video. Before sharing, watch the rendered result from start to finish and confirm that the picture and sound match your intention. If you spot an issue, make a targeted correction rather than rebuilding the entire sequence. This small review step is especially worthwhile for a clip you plan to send to someone else.
CapCut is free to download, but it includes in-app purchases ranging from $0.49 to $900.00 per item. That range is broad, so I would not assume every optional purchase is necessary for a basic edit. Start with the tools you can already use and decide whether a paid option solves a specific problem for you. The app is rated Teen, which is worth considering when choosing an editing app for a younger user or a shared device.
When it fits, and when another editor makes more sense
Compared with a basic phone gallery editor, CapCut is better suited to someone who wants more control over how several clips work together. Compared with a conventional desktop video editor, it is the more approachable choice when the footage is on your phone and the goal is a quick, compact project. That is a practical distinction, not a claim that one tool is best for every job: a longer production with detailed, precise adjustments may be more comfortable in software designed for a larger screen.
I would recommend it to a first-time editor who is willing to learn by making one small video at a time. It is also a good fit for someone who regularly turns everyday footage into short posts, recaps, or simple explainers. The current version is 19.9.0 and supports Android 6.0 or later, so it can serve a range of Android devices, though an older or slower phone may make an ambitious project less pleasant to handle. I would keep the first edit lightweight and see how the device feels before committing to a larger one.
On the other hand, skip it if you want an editor that gets out of the way completely, or if you only need to trim one recording and never intend to shape a sequence. Someone who prefers detailed work on a computer may also be happier with a desktop alternative. CapCut’s strength is its balance of accessible, phone-based editing and room to refine a clip; that balance comes with a learning curve and choices you can safely ignore until you need them.
A sensible next step after your first video
Once you have completed a simple edit, make a second one with a single specific aim. For example, try improving the rhythm of a short sequence without adding visual decoration, or make a quiet recap where the original sound matters. Changing one thing at a time teaches you what the tool is doing and helps you develop taste, rather than relying on presets or effects to decide the style for you.
My overall impression is that CapCut is a capable starting point for people who want to edit real-life footage on their phones and are prepared to spend a little time learning its workflow. The sheer scale of its audience makes it familiar to many people, but I would judge it by whether it helps you finish the video you set out to make. Begin with a few good clips, focus on order and timing, and add polish only when it serves the story. If that sounds like the kind of editing you want, CapCut is worth trying; if you need only basic trimming or prefer a desktop workspace, a simpler or more specialized alternative may suit you better.
What we like
- Easy-to-use editing tools suit beginners and casual creators.
- Keyframes enable precise control over motion and effects.
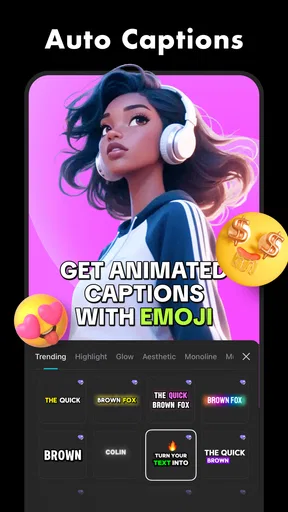
- Auto captions can save time when adding subtitles.
- A large library of templates speeds up social video creation.
- Exports support common formats for sharing across platforms.
What could be better
- Some advanced tools require a paid subscription.
- The interface can feel crowded with editing options.
- Cloud features may require an account and internet access.
- Export settings may be limited compared with desktop editors.
- Some templates and effects may not be available in every region.